Need help? Call us:
+1 1800 212 3434


Brushless Drone H16 Avoidance with Dual Battery 4K 1080P HD Dual Camera
₹4,999.00 Original price was: ₹4,999.00.₹3,299.00Current price is: ₹3,299.00.
🔥 Buy More Save More!
Buy 3 items get 5% OFF
on each productBuy 6 items get 10% OFF
on each productBuy 10 items get 15% OFF
on each productHave any Questions?
Feel free to Get in touch
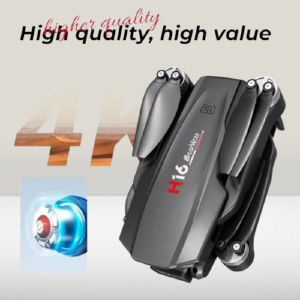
4K FPV Camera – Drone Built-in 4K camera ensures shooting high resolution images and videos with rich details. 120°wide-angle and 90° adjustable lens capture a impressively big and vivid picture from any angle. 5G FPV transmission is ultra-high reliability and low-latency, provides a smooth and high-definition live streaming experience.
Next Level Fly Performance – Come with 2 intelligent batteries to support 45mins long flight time and 1KM long range. The Brushless Motor provides higher speed, higher efficiency and better stability to resist the wind, worry-less in the difficult fly conditions. Drone is lightweight, portable, makes it a perfect drone for adults, travel, aerial photography, outdoor activities.
Versatile and 𝖥𝗎𝗇 – Experience a range of exciting features including High-Speed Rotation, Circle Fly, Gesture Control, Headless Mode, Altitude Hold, 360° Flip, Low Battery Reminder, and Emergency Stop. Whether you’re a beginner or an experienced flyer, this drone has something to offer everyone.
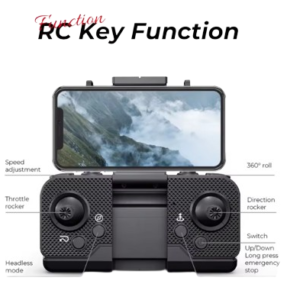
One Key Start/Landing – Our RC drone features a one-key start/landing button, allowing for easy and hassle-free control, and enabling you to enjoy a one-button flight anytime and anywhere. This makes the sky and nature your ultimate playground.
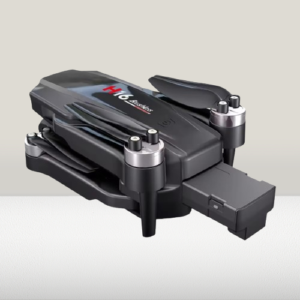
Brushless Motor Drone – Equipped with brushless motors, our drone achieves higher speeds and offers greater stability. Its arms provide strong power to achieve stable and fast flight of the camera drone, which can provide you with a perfect flying experience.
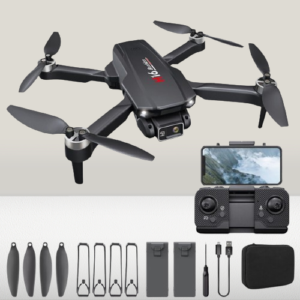
Perfect Gift – A mini drone with a camera makes for a cool and creative gift. Along with that, the package includes a portable bag for outdoor travel. The drone comes with propeller guards, spare fan blades, and remote control batteries, ensuring safety and reliability.
Package Contents – 1 x Drone, 1 x Remote control transmitter, 2 x Body battery, 1 x Spare blade set, 1 x USB cable, 1 x Screwdriver. Remote control requires 3 AAA batteries (not included).
1.Aircraft calibration before takeoff
Before taking off, the aircraft should be aligned with the frequency and then calibrated. The light of the aircraft flashes during calibration, and the light is always on after calibration is completed. Avoid losing control, you need to always pay attention to slowly operate the control stick when controlling the movement of the aircraft, the aircraft will lose a little power during the operation, so you can add a little extra throttle to keep the aircraft at a certain height during the flight practice. the aircraft encounters impact or extemal collision and other reasons, resulting in directional deviation, at this
2.Calibration reset
When time, you can first land the aircraft on a flat surface to ensure The front of the aircraft (the camera is the front) and the remote control front direction consistent. The left stick of the remote control to the left bottom dial, the right stick to the right bottom dial (This action requires the left remote control to the lower left and the right remote control to the
3. Aircraft calibration before take off
lower right) The remote control will make a “beep” sound, then the calibration is completed. The remote control will tick when the aircraft is low on power. If the aircraft is dropped or lowered to take off again, it is recommended to recalibrate it first.
4. Remote control battery installation
Please follow the direction of the arrow first open the battery cover, and then 3 alkaline batteries No. 5 in accordance with the polarity of the battery box installed in order (batteries need to be purchased separately, and not mixed with the old and new or different types of batteries) Please use 3 No. 5 batteries (AA) and assemble them according to the positive and negative polarity direction (do not mix different sizes of batteries).
Battery cover
Open the battery cover first as shown.
5. Flight battery installation
1. Plug the USB charger into the computer USB port or other chargers connected to USB, and then tum on the power.
2 will remove the battery from the aircraft, and then connect the battery plug with the USB charger on the socket for charging.
USB charger
Note: The charging time is about 120 minutes.
6.The battery is in the process of charging, the indicator light is red, the indicator light is green or off after charging saturation.
Lithium poly battery Adapter to be purchased separately
7. Special Notes
The battery needs to be fully charged before using the drone.
When using the need to choose a smaller airflow and a little bit of open space, to avoid collisions with drones, because the drone repeatedly collision may cause damage to the motor or fan blade damage. When the drone is connected to a cell phone, the use should be connected to a WiFi hotspot first, and then open the cell phone APP to use.
When the drone is connected to a cell phone, the use should be connected to a WiFi hotspot first, and then open the cell phone APP to use.
Open the drone. You need to open the front 2 arms first, and then open the back 2 arms.
If the drone takes off and flies in a certain direction, you need to place the drone on a flat surface and reset the calibration, and the remote control will emit a “drop” sound to complete the calibration.
 Brushless Drone H16 Avoidance ...
₹4,999.00 Original price was: ₹4,999.00.₹3,299.00Current price is: ₹3,299.00.
You may add any content here from XStore Control Panel->Sales booster->Request a quote->Ask a question notification
At sem a enim eu vulputate nullam convallis Iaculis vitae odio faucibus adipiscing urna.
Reviews
There are no reviews yet.